Birds are not only a delight to watch, but they also play an essential role in our ecosystem by helping with pollination and insect control. If you're a nature enthusiast or simply enjoy the serene beauty of birds, creating a DIY bird feeder for your garden is an excellent idea. Building your bird feeder is not only a fun and rewarding project but also a great way to attract a variety of avian visitors to your outdoor space. In this article, we'll guide you through the process of designing a DIY bird feeder that's both functional and visually appealing.
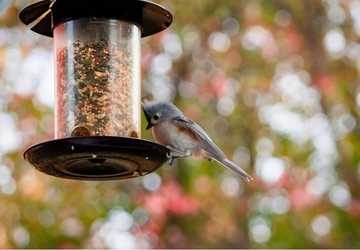
Materials You'll Need
Before we dive into the steps for creating your DIY bird feeder, let's gather the materials you'll need. Most of these items can be found at your local hardware store or repurposed from things you already have at home. Here's what you'll need:
A wooden plank or board
A ruler or measuring tape
A pencil
A saw
Screws and a screwdriver
A drill with bits
A small eye hook
Strong twine or a chain
Acrylic or non-toxic paint (optional)
Paintbrushes (optional)
Birdseed
A tray or small dish
Now, let's get started with the step-by-step process of designing your very own bird feeder.
Step 1: Plan Your Design
The first step in creating your DIY bird feeder is to plan your design. Think about the type of birds you want to attract and the aesthetic you'd like for your garden. You can create a simple platform feeder or a more intricate design like a house or a bottle feeder. Once you have a clear vision, sketch it on the wooden plank using your ruler and pencil. This will serve as a blueprint for your project.
Step 2: Cut the Wood
Using a saw, carefully cut the wooden plank along the lines you've drawn. Make sure to measure and cut the pieces precisely, as this will ensure your bird feeder is stable and functional. Sand down the edges to smoothen any rough surfaces to prevent injuries to the birds.
Step 3: Assemble the Feeder
With your wooden pieces ready, it's time to assemble the bird feeder. Depending on your design, you may need to attach sides, a roof, or a base. Use screws and a screwdriver to secure the pieces together. Ensure that your feeder has an open side for the birds to access the birdseed.
Step 4: Create Feeding Ports
If you'd like to offer a variety of birdseed to different bird species, consider adding feeding ports to your bird feeder. Using a drill and the appropriate bit size, make small holes or openings in your feeder where the birds can easily access the bird seed. Make sure the openings are not too large, as this could lead to excessive spillage.
Step 5: Paint and Decorate (Optional)
Adding a touch of color to your bird feeder can make it a visually pleasing addition to your garden. Use acrylic paint and brushes to decorate your feeder as you see fit. Be creative, but remember to use non-toxic paint to ensure the birds' safety.
Step 6: Attach an Eye Hook
To hang your bird feeder, attach a small eye hook to the top of your design. Ensure it's securely fastened to prevent the feeder from falling. You can also use a chain or strong twine for hanging, depending on your preference and the weight of your bird feeder.
Step 7: Fill with Birdseed
Now that your bird feeder is complete, it's time to fill it with birdseed. Use a tray or a small dish to hold the birdseed, and then place it inside the feeder. Make sure it's easily accessible to the birds through the feeding ports you created.
Step 8: Find the Perfect Location
Choosing the right location for your bird feeder is crucial to attracting birds. Please place it in a spot where you can observe the birds without causing too much disturbance. Consider mounting it on a sturdy pole or hanging it from a tree branch, but ensure it's at a height that's convenient for both you and the birds. Keep the feeder away from areas where potential predators like cats can easily pounce on the unsuspecting visitors.
Step 9: Maintenance and Cleaning
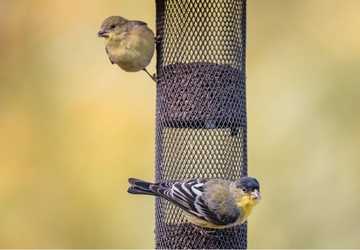
To keep your bird feeder inviting to birds and in good condition, regular maintenance is essential. Clean the feeder every two weeks to prevent the buildup of mold, bacteria, or spoiled birdseed. Use warm, soapy water and a brush to scrub away any residue. Rinse thoroughly and allow it to dry completely before refilling with fresh birdseed.
Additional Tips
Providing a variety of birdseed types in your garden, including sunflower seeds, millet, and suet, can attract a diverse range of bird species. It's not just about food, though. Adding a bird bath nearby can serve as a water source for these feathered visitors, giving them a place to drink and bathe.
However, attracting birds to your new feeder may require some patience. It could take a while for birds to discover this new source of food and water. But don't worry; the wait is part of the process. Over time, you'll see an increase in the number of feathered visitors to your garden.
Conclusion
Designing a DIY bird feeder for your garden is a wonderful way to connect with nature and contribute to the well-being of local wildlife. With the right materials, a well-thought-out design, and a little creativity, you can create a bird feeder that not only serves as a practical feeding station but also enhances the beauty of your outdoor space.
With regular maintenance and care, your DIY bird feeder will become a cherished part of your garden, bringing joy and a sense of connection to the natural world right to your doorstep. So, grab your tools, get creative, and get ready to welcome a host of feathered friends to your garden with your unique DIY bird feeder.


